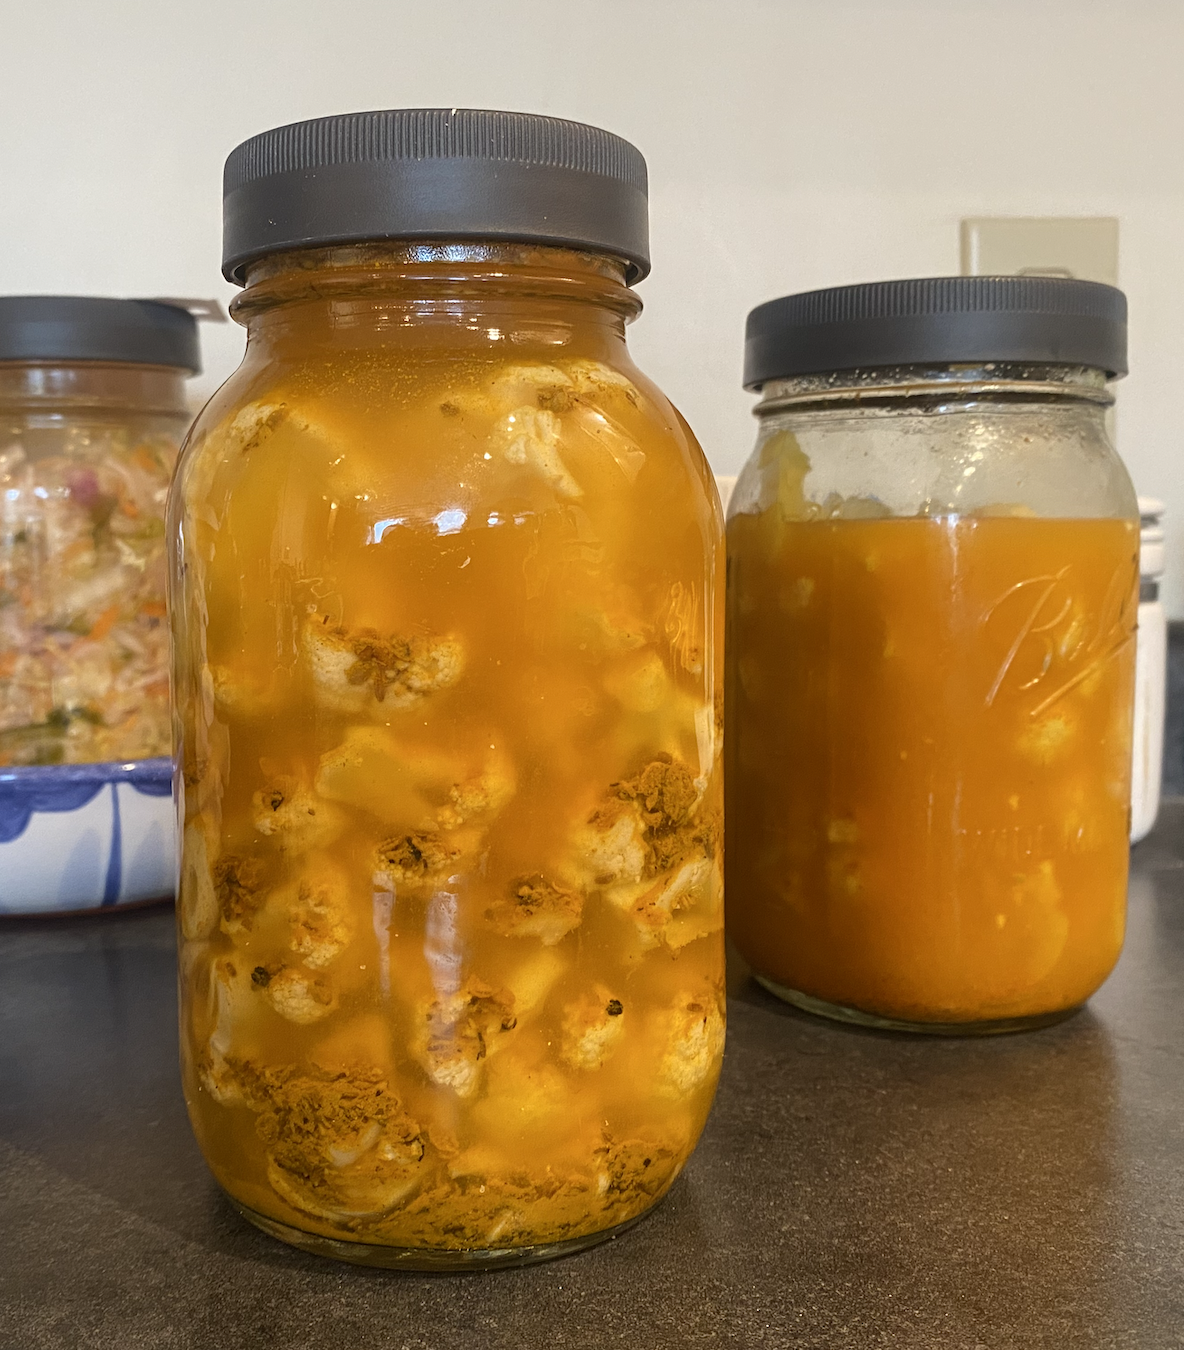
Tangy Curried Cauliflower

You can make these delicious and vibrantly yellow florets with a favorite store-bought curry powder, or create your own fresh mixture of curry spices. I have tried both techniques, and both resulting ferments are delicious. However, the depth lent by freshly toasted and ground spices is perceptible, and worth the time, IMO.

Ingredients:

  • 1/2 head of organic cauliflower (this will fit into 1 quart mason jar)

  • 1 generous tablespoon of your favorite curry powder, or make your own blend! Here’s what I use:

  • spices: 1 t teaspoon each of toasted cumin, coriander, fenugreek, 1 teaspoon of black peppercorns, 2 teaspoons of turmeric (plus anything else you might want). Put everything into a mortar and pestle and grind to a medium coarseness.

  • 1 inch of fresh ginger root sliced into coins, 2 garlic cloves, sliced

  • 2% brine (2 teaspoons in 2 C water)

  • 1/4 cup of juice from any previous ferment (vegetables, sauerkraut, fermented pickles) - this is charmingly called “backslop”. This step is optional, but kicks the ferment into gear a little faster by adding a dose of microbes and acid.

Equipment:

glass mason jar and lid

mortar and pestle

cutting board and knife

skillet to toast spices

Technique:

  • pull the cauliflower into small-medium-sized florets

  • toast and grind your spices, or open your favorite jar of curry powder or paste

  • slice ginger and garlic

  • Put everything in the jar. You can be methodical, putting the spices in the bottom, then layering cauliflower followed by ginger and garlic, repeating up the jar, finishing with the cauliflower. Or just tumble everything in together. The ferment doesnt really care about order.

  • Leave about 2 inches of clearance at the top, and then pour in the brine to almost cover the veggies.

  • add your backslop to submerge your veggies. If you are not using a backslop, simply add more brine.

  • put the lid on and turn it upside down a few times to shake it all up and distribute the spices.

  • store the ferment in a safe spot, loosening the lid so it can expel CO2, one of the end-products of fermentation.

  • taste in about 5-7 days, and when it is as tangy as you’d like it, tighten the lid and put it in the fridge.

These tangy morsels are great snacks, or served alongside a dal and rice. It’s a beautifully vibrant addition to a thali or regular dinner platter. Don’t discard the curry liquid! It’s great in soups than need some zing, or added to some olive oil to create a curry vinaigrette pre-loaded with acid, salt and probiotics!

Fermented Crisp and Sour Slaw

This salad is a tangy shredded vegetable ferment, tossed with a delicious vinaigrette - no goopy mayonnaise here. It’s a great side for grilled meats or fish, but can stand alone as a lovely lunch salad with a hunk of sourdough and a slice of crumbly blue cheese. The first part describes how to shred and ferment the vegetables. Part 2 describes how to drain and dress the vegetables for a final delicious Fermented Slaw.

Part 1 - Make the fermented vegetables

Ingredients: (can vary according to what you have in the fridge)

1 pound of green cabbage, sliced thinly (purple? broccoli? cauliflower? turnip?)

1 large onion, red or yellow, sliced thinly (I prefer red for the color, and don’t use a sweet onion - too sugary)

1 large green bell pepper, sliced thinly, (or use a mandolin)

1 large carrot (shredded on a cheese grater, large holes)

1/2 green apple, shredded on the same cheese grater (optional)

1/4 pound celeriac (celery root, shredded on a cheese grater, large holes) or 1 teaspoon celery seed

4 tsp salt (2% by weight, so you could also weigh all your veggies for a result in grams, then divide by 100 to get the grams of salt needed)

Equipment:

Chopping board, knife, (mandolin?), large mixing bowl, 2 quart mason jars with lids

Technique:

Mix the shredded vegetables with the salt in the mixing bowl. Massage well with your hands until the vegetables wilt a little and give off some liquid. Pack into the jars, pressing the vegetables underwater. Don’t add extra brine yet. The veggies will settle down over night and express more liquid, but if some still rise above the surface of the liquid the next morning, add more brine (1 Tbs/cup water) or some extra liquid from a previous ferment. Ferment 4-7 days, until the veggies are tangy. Inspect the veggies every morning, submerging then firmly. Taste them at day 4, and continue fermenting until they taste nicely sour. Then continue with part 2.

Part 2 - Construct the Slaw:

Make about 3/4 - 1 cup of vinaigrette. It can be your favorite recipe, or try the mixture suggested below by my friend Alex Lewin (Author of Real Food Fermentation, the book which has inspired many of my recipes).

Put the fermented vegetables in a colander in a large bowl and press out the juice. Reserve.

In another bowl, mix the pressed fermented veggies with half of the vinaigrette. Add more if needed to nicely moisten the veggies - don’t drown them. Put the mixture back in your jars and refrigerate.

Voilá! Fermented Slaw! Enjoy!

****

Alex’s Carolina-Style vinaigrette: 1/2 cup of juice pressed from the ferment, 1/4 C of honey, 6 Tablespoons of oil (sesame? olive? coconut? Your choice, or mix it up!) 2 teaspoons of dry mustard, 1 tsp grated fresh ginger, freshly ground black pepper.

What to do with leftover fermentation juice? Mix with oil and spices and make salad dressing. Use as a salty-sour liquid condiment or addition to soup. Use it as a marinade. For your next vegetable ferment, use it to cover the vegetables instead of plain brine. It’s a source of probiotics, so you could also drink it as a tonic - watch out, it’s very salty!!

Fermented Potatoes

For some reason I didn’t think one could ferment potatoes because one doesn’t eat them raw. Then I challenged myself, did some research and lo and behold, lots of people are fermenting potatoes. So I thought I’d give it a try; total success! I tossed the fermented spuds in olive oil, salt and rosemary and roasted them. They were delicious, had an interesting tang and were chewy! Give it a try with any potato, including sweet potatoes.

Ingredients and Materials

3-4 potatoes of any kind or color

Brine; 2 tablespoons of salt dissolved in 2 cups of water

Sharp knife, cutting board and a glass jar with a lid. I used a regular quart-sized mason jar.

Technique

Cut the potatoes into any shape you desire - chunks or rounds, and fill your jar about 3/4 - 4/5 full. Pour the brine on top to cover by about an inch so the potatoes are submerged. They may float a little, push them down. If they stubbornly persist in floating, you can weight them down with a clean weight, some people pass a lovely stone through the dishwasher to have on hand for such eventualities.

Mold will eventually form on any vegetable that protrudes from the fermentation surface, so do pay attention to this detail. If mold does form, or a whitish scum forms on the surface of the liquid, not to worry. Rescue any floating weirdly-affected vegetable piece, wash it off if it’s still firm, and put it back in. Skim the surface, blot it with a paper towel and wipe around the top interior edge and surface of the jar to decrease the less-desirable microbe load. Give up on getting it all - you are vastly outnumbered, your job is to keep the majority underwater happy. The brine and increasing acidity will do the remaining work.

Put the jar of brined potatoes (lid on loosely to avoid large contaminants) in a cupboard out of direct sunlight. Examine it every morning, and push the vegetables underwater if things start to float. Remember that CO2 is being released during the fermentation and will create bouyancy.

Wait 3-4 days, then drain and rinse the potatoes, and use them as you would in any potato recipe. I roast them, put them in soup, etc.

Sweet, red and yellow potatoes in brine. And now we wait…

Shaved Zucchini Salad

There’s only so many things one can do with zucchini, and then you have to start stashing it in people’s cars, or secretly putting it on folk’s porches. This is a good one with zucchini that are not too big and still flavorful and tender. In fact I think that’s how you get ahead of the zucchini game. Pick them while they are still small- medium-sized. Otherwise, they get ridiculous.

1/3 cup extra-virgin olive oil

2 tablespoons fresh lemon juice

1 teaspoon coarse kosher salt

1/2 teaspoon freshly ground black pepper

1/4 teaspoon dried crushed red pepper

2 pounds medium zucchini, trimmed

1/2 cup coarsely chopped fresh basil

1/4 cup pine nuts, toasted (optional)

Small wedge of Parmesan cheese

PREPARATION

Whisk oil, lemon juice, 1 teaspoon coarse salt, 1/2 teaspoon black pepper, and crushed red pepper in small bowl to blend. Set dressing aside.

Using vegetable peeler or V-slicer and working from top to bottom of each zucchini, slice zucchini into ribbons (about 1/16 inch thick). Place ribbons in large bowl. Add basil and nuts, then dressing; toss to coat. Season to taste with salt and pepper. Using vegetable peeler, shave strips from Parmesan wedge over salad.

https://www.epicurious.com/recipes/food/views/shaved-zucchini-salad-with-parmesan-pine-nuts-360251

Screen Shot 2019-08-19 at 2.49.11 PM.png

Summer Lettuce Cups

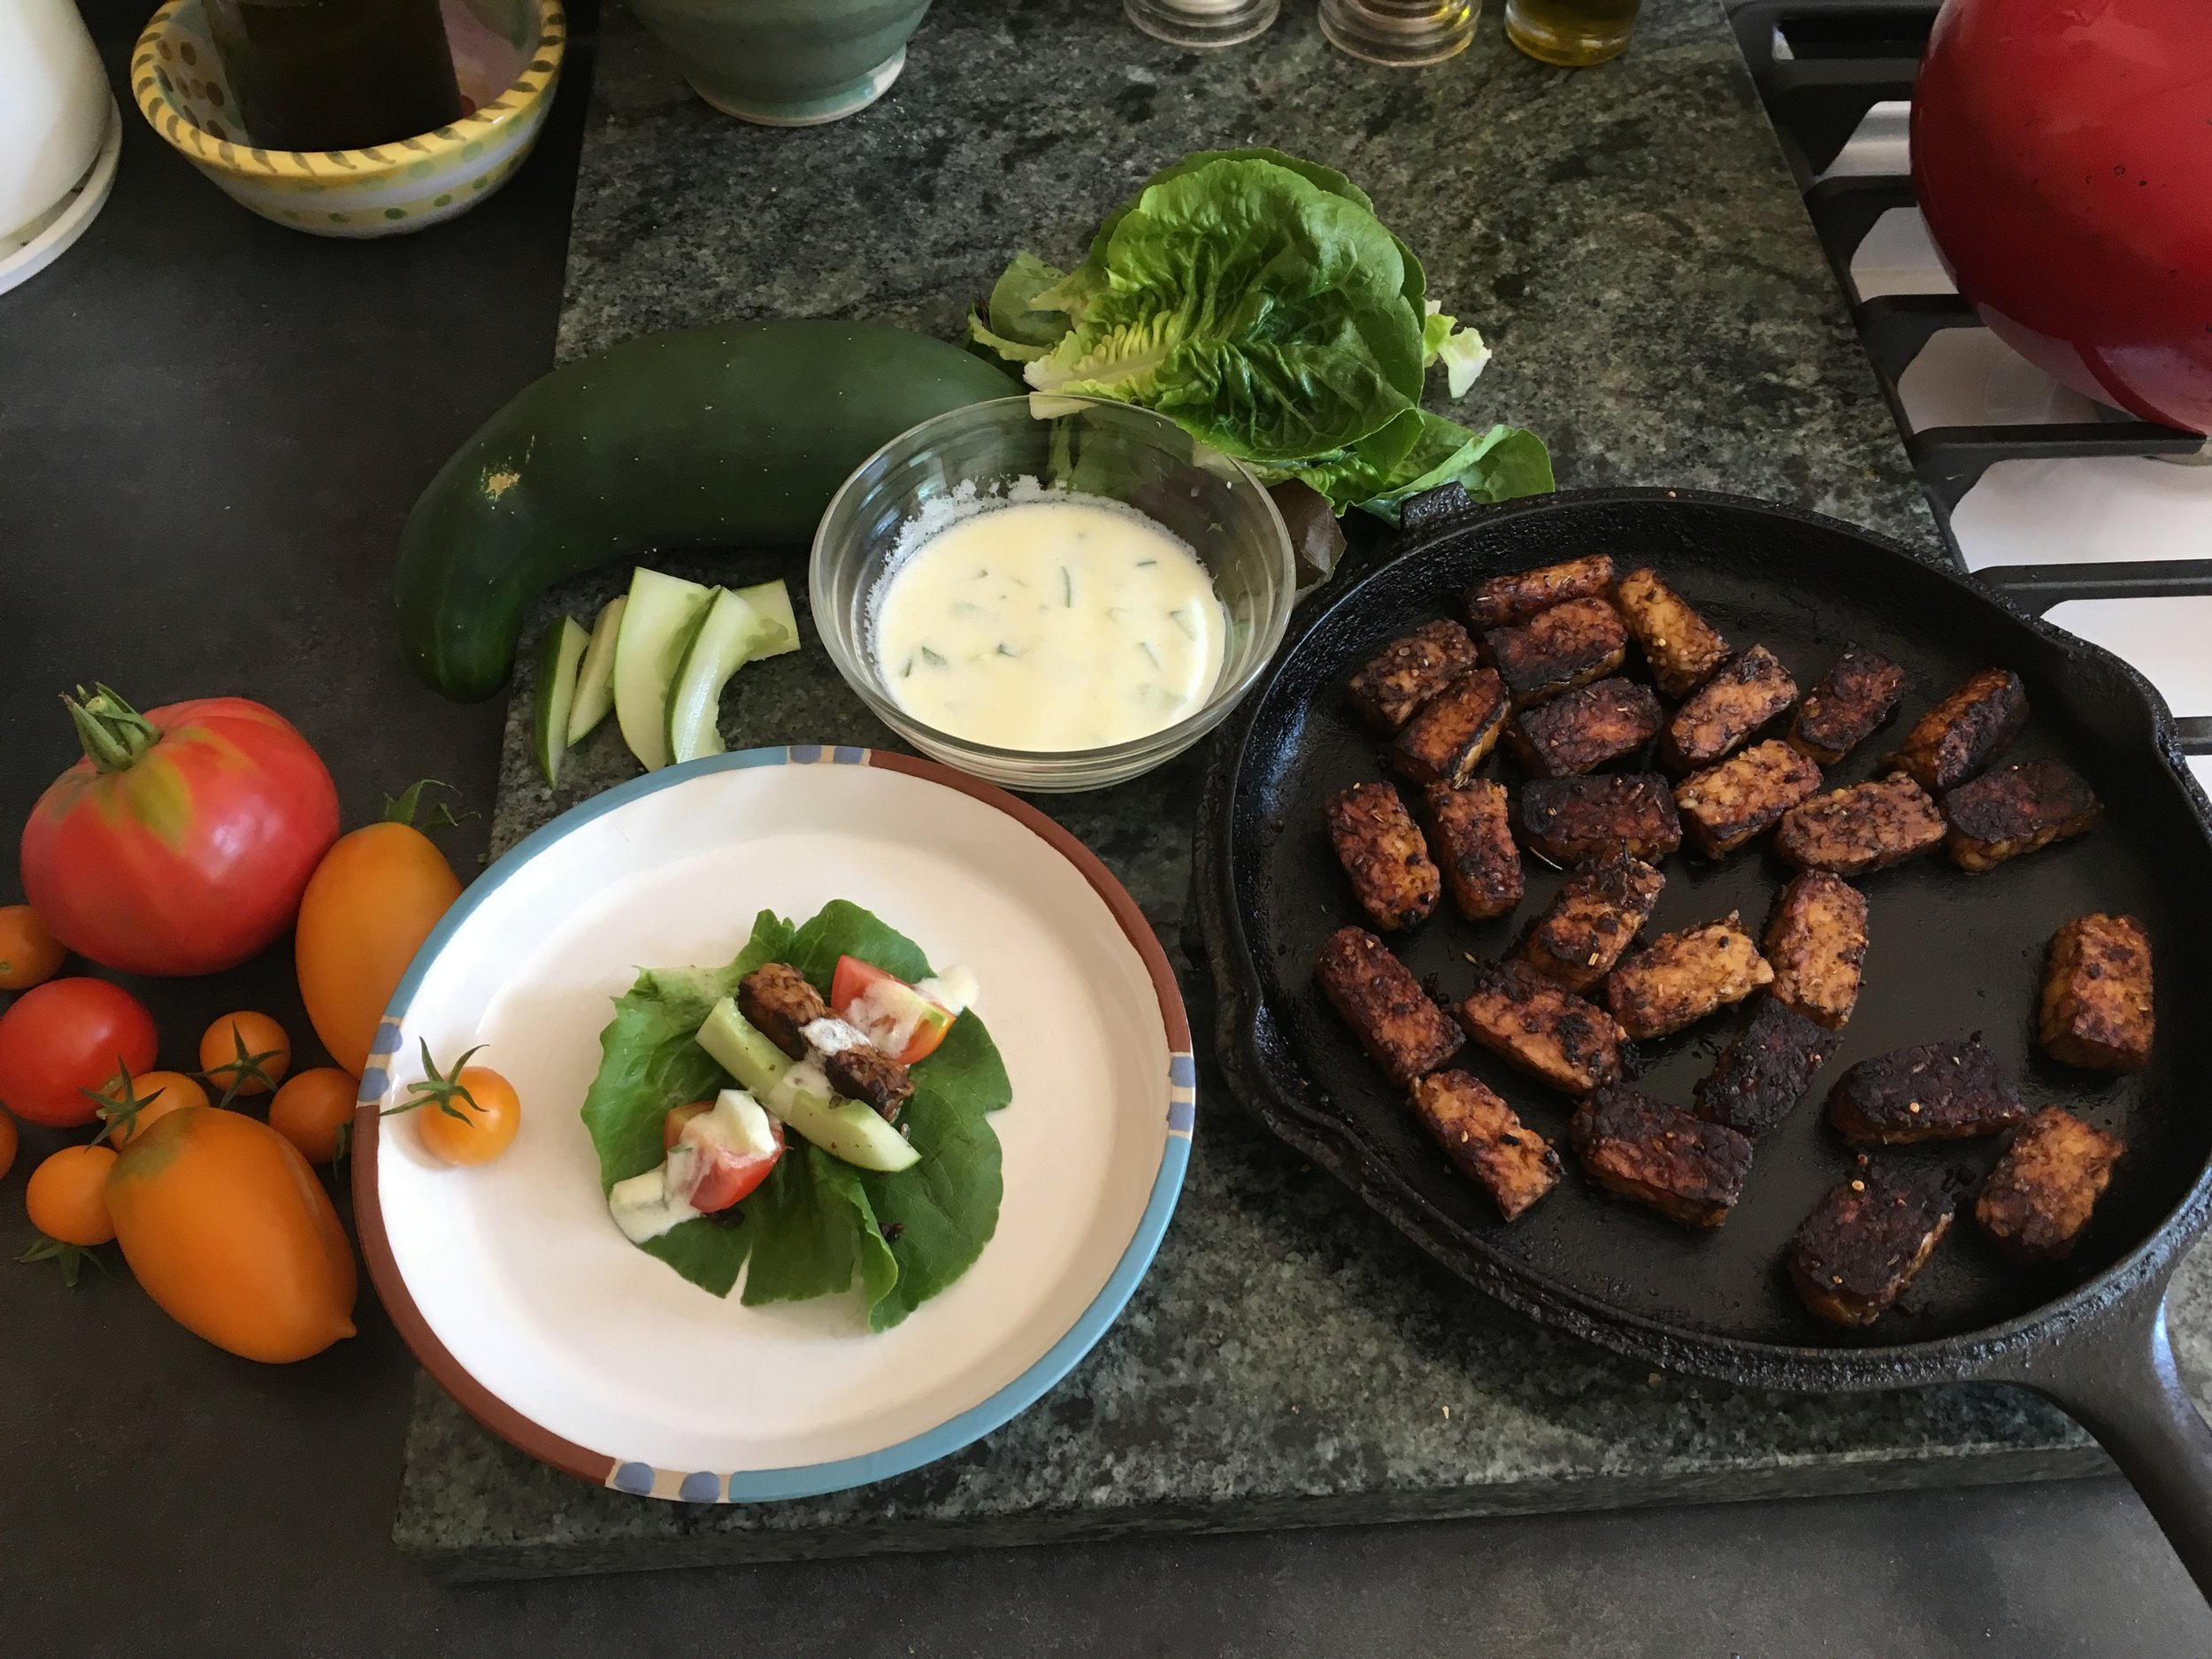
I made this up for the summer potluck. I wanted easy finger food with protein, not too heavy, and that featured juicy summer garden vegetables. Since the garden is currently spewing cucumbers and tomatoes, they got the job. I used lettuce cups as a wrap for the ingredients for added crunch, moisture-resistance, fiber and finger-food-ability. Bread or crackers would have become soggy and added an unnecessary caloric burden/blood sugar spike.

Best of all worlds - it’s delicious, not messy, tastes great, and feels good in the body later on too. A true Happiness recipe.

Ingredients: package of tempeh (a package of tempeh will give you about 12-13 batons), or 24 smaller half batons, 12 or 24 leaves of butter lettuce, or another firm’ish lettuce that has medium-sized bowl-shaped leaves - endive would work well too. 12 or 24 Cherry tomatoes, cucumber cut into 12 or 24 batons, tzatziki sauce (see next recipe).

  • cut tempeh into 1/4 inch thick batons, marinate in your favorite salad dressing. (I use a home-made balsamic)

  • sauté in olive oil medium heat until golden brown on all sides, set aside to cool

  • make tzatziki sauce while tempeh is marinating (see next recipe, or create your own creamy sauce)

Bring all the ingredients separately to your event along with a nice platter, and find an accomplice to help you. A great way to easily meet new people is to ask them for help with food prep!

To assemble, put a green leaf down on the platter, add a piece of tempeh, a cherry tomato and a cucumber baton. Drizzle lightly with tzatziki sauce. Serve as individual bites, sushi-style for people to nab, wrap and eat in a bite or two.

IMG_2941.jpg

Sautéed Leeks with mustard and cumin

(makes 2 C of cooked leeks)

2 medium leeks (or 4 small)

1/4 C extra virgin olive oil

1 teaspoon cumin seeds

2 tablespoons of prepared mustard

1 teaspoon honey

Prepare the leeks: remove roots and very tops of greens. Cut lengthwise and rinse well. Julienne cross-wise into thin strips. Combine oil, cumin seeds and green parts of the leek in a medium frying pan and sauté over medium-low heat for 2 minutes. Add white portions of leeks and sauté for another 8 minutes  stirring frequently. Add mustard and honey and sauté over low heat for a few more minutes until cooked through – taste them for seasoning. You can serve them hot or cold.